<?xml version="1.0" encoding="utf-8"?><feed xmlns="http://www.w3.org/2005/Atom" ><generator uri="https://jekyllrb.com/" version="3.10.0">Jekyll</generator><link href="https://www.skilledcookie.com/feed.xml" rel="self" type="application/atom+xml" /><link href="https://www.skilledcookie.com/" rel="alternate" type="text/html" /><updated>2024-08-23T10:29:08+00:00</updated><id>https://www.skilledcookie.com/feed.xml</id><title type="html">Skilled Cookie</title><subtitle>A site containing blogs posts relating to all things software development.</subtitle><entry><title type="html">Middleware Patterns for System Integrations</title><link href="https://www.skilledcookie.com/2024/08/23/middleware-patterns-for-system-integrations/" rel="alternate" type="text/html" title="Middleware Patterns for System Integrations" /><published>2024-08-23T01:00:00+00:00</published><updated>2024-08-23T01:00:00+00:00</updated><id>https://www.skilledcookie.com/2024/08/23/middleware-patterns-for-system-integrations</id><content type="html" xml:base="https://www.skilledcookie.com/2024/08/23/middleware-patterns-for-system-integrations/"><![CDATA[<h3 id="introduction">Introduction</h3>
<p>In today’s complex IT environments, integrating multiple systems through a single API is a common requirement. However, managing these integrations effectively requires the right middleware patterns. Middleware acts as the glue that binds different systems together, ensuring they can communicate and work as a unified system. But with so many middleware patterns available, choosing the right one for your use case can be challenging.</p>

<p>In this post, we’ll explore some of the most common middleware patterns for API integrations, detailing their key features, ideal use cases, and when they might become an anti-pattern.</p>

<h3 id="1-api-gateway-pattern">1. API Gateway Pattern</h3>

<p>The <strong>API Gateway</strong> is a popular pattern, especially in microservices architectures. It serves as a single entry point for all client requests, handling tasks such as routing, request/response transformation, and security.</p>

<h4 id="key-features">Key Features</h4>

<ul>
  <li><strong>Routing</strong>: Directs client requests to the appropriate backend systems.</li>
  <li><strong>Aggregation</strong>: Combines responses from multiple services into a single response.</li>
  <li><strong>Security</strong>: Manages authentication, authorization, and rate limiting.</li>
  <li><strong>Protocol Translation</strong>: Converts protocols as needed, such as from REST to SOAP.</li>
</ul>

<h4 id="use-cases">Use Cases</h4>

<ul>
  <li>Simplifying client interactions by exposing a unified API.</li>
  <li>Centralizing security and monitoring for multiple backend services.</li>
</ul>

<h4 id="when-not-to-use--anti-pattern">When Not to Use / Anti-Pattern</h4>

<ul>
  <li><strong>Monolithic Overhead</strong>: If the gateway becomes a bottleneck or a single point of failure, it’s a sign of over-centralization.</li>
  <li><strong>Scalability Issues</strong>: In highly scalable environments, an overly complex gateway can hinder performance.</li>
  <li><strong>Complex Routing Logic</strong>: Avoid when routing logic becomes too complex, making the gateway difficult to manage.</li>
</ul>

<h3 id="2-backend-for-frontend-bff-pattern">2. Backend for Frontend (BFF) Pattern</h3>

<p>The <strong>Backend for Frontend (BFF)</strong> pattern is designed to create a specific middleware layer tailored to the needs of a particular frontend, such as web, mobile, or IoT applications.</p>

<h4 id="key-features-1">Key Features</h4>

<ul>
  <li><strong>Tailored APIs</strong>: Each frontend gets a custom API, reducing complexity on the client side.</li>
  <li><strong>Orchestration</strong>: Handles calls to multiple backend systems and aggregates the results.</li>
  <li><strong>Decoupling</strong>: Allows frontend and backend teams to work more independently.</li>
</ul>

<h4 id="use-cases-1">Use Cases</h4>

<ul>
  <li>When different frontends have unique requirements or workflows.</li>
  <li>Optimizing the client experience by minimizing API calls.</li>
</ul>

<h4 id="when-not-to-use--anti-pattern-1">When Not to Use / Anti-Pattern</h4>

<ul>
  <li><strong>Duplication of Effort</strong>: With many frontends, separate BFFs can lead to duplication and maintenance challenges.</li>
  <li><strong>Over-Complexity</strong>: Avoid if business logic is duplicated across multiple BFFs, leading to inconsistencies.</li>
  <li><strong>Small-Scale Projects</strong>: Unnecessary complexity for projects with similar frontend requirements.</li>
</ul>

<h3 id="3-enterprise-service-bus-esb-pattern">3. Enterprise Service Bus (ESB) Pattern</h3>

<p>An <strong>Enterprise Service Bus (ESB)</strong> provides a centralized integration platform, managing communication, transformation, and orchestration between multiple systems.</p>

<h4 id="key-features-2">Key Features</h4>

<ul>
  <li><strong>Message Routing</strong>: Routes messages between APIs and backend systems.</li>
  <li><strong>Transformation</strong>: Converts data formats and protocols between systems.</li>
  <li><strong>Orchestration</strong>: Manages workflows that span multiple systems.</li>
  <li><strong>Mediation</strong>: Decouples systems, allowing them to communicate through the ESB.</li>
</ul>

<h4 id="use-cases-2">Use Cases</h4>

<ul>
  <li>Ideal for integrating multiple, heterogeneous systems, especially in legacy environments.</li>
  <li>Managing complex message transformation and protocol mediation.</li>
</ul>

<h4 id="when-not-to-use--anti-pattern-2">When Not to Use / Anti-Pattern</h4>

<ul>
  <li><strong>Over-Engineering</strong>: Introducing an ESB for simple integrations adds unnecessary complexity.</li>
  <li><strong>Single Point of Failure</strong>: Without redundancy, the ESB can bring down the entire integration layer.</li>
  <li><strong>Latency and Performance</strong>: The additional layers of mediation can introduce significant latency.</li>
</ul>

<h3 id="4-service-compositionorchestration-pattern">4. Service Composition/Orchestration Pattern</h3>

<p>In the <strong>Service Composition/Orchestration</strong> pattern, middleware acts as an orchestrator, coordinating the execution of various services to fulfill a single API request.</p>

<h4 id="key-features-3">Key Features</h4>

<ul>
  <li><strong>Service Aggregation</strong>: Combines responses from multiple services.</li>
  <li><strong>Workflow Management</strong>: Controls the sequence of service calls based on business rules.</li>
  <li><strong>Error Handling</strong>: Manages errors and retries across services.</li>
</ul>

<h4 id="use-cases-3">Use Cases</h4>

<ul>
  <li>When API requests require executing complex business processes across multiple services.</li>
  <li>Scenarios requiring orchestration of microservices to deliver a unified response.</li>
</ul>

<h4 id="when-not-to-use--anti-pattern-3">When Not to Use / Anti-Pattern</h4>

<ul>
  <li><strong>Tight Coupling</strong>: Orchestration that’s tightly coupled with business processes can make the system brittle.</li>
  <li><strong>Performance Bottlenecks</strong>: Over-orchestrating services can slow down response times.</li>
  <li><strong>Simple Use Cases</strong>: Overhead from orchestration might be unnecessary for straightforward tasks.</li>
</ul>

<h3 id="5-message-broker-pattern">5. Message Broker Pattern</h3>

<p>A <strong>Message Broker</strong> facilitates asynchronous communication between the API and multiple backend systems using message queues or topics.</p>

<h4 id="key-features-4">Key Features</h4>

<ul>
  <li><strong>Decoupling</strong>: Allows APIs and backend systems to operate independently.</li>
  <li><strong>Scalability</strong>: Supports high throughput by handling messages asynchronously.</li>
  <li><strong>Reliability</strong>: Ensures reliable message delivery through persistence and retries.</li>
</ul>

<h4 id="use-cases-4">Use Cases</h4>

<ul>
  <li>Event-driven architectures where APIs trigger processes across multiple systems.</li>
  <li>High-scalability scenarios, such as processing large transaction volumes.</li>
</ul>

<h4 id="when-not-to-use--anti-pattern-4">When Not to Use / Anti-Pattern</h4>

<ul>
  <li><strong>Complexity for Simple Tasks</strong>: Overkill for straightforward, synchronous communication.</li>
  <li><strong>Message Order Sensitivity</strong>: Challenging to maintain strict message order without specialized design.</li>
  <li><strong>Latency Concerns</strong>: Not suitable for applications requiring immediate response times.</li>
</ul>

<h3 id="6-service-mesh-pattern">6. Service Mesh Pattern</h3>

<p>A <strong>Service Mesh</strong> manages service-to-service communication, often used in microservices architectures. It handles traffic management, security, and observability without altering application code.</p>

<h4 id="key-features-5">Key Features</h4>

<ul>
  <li><strong>Traffic Control</strong>: Load balancing, routing, and retries across services.</li>
  <li><strong>Security</strong>: Manages service-level security policies.</li>
  <li><strong>Observability</strong>: Provides insights into service interactions and performance.</li>
</ul>

<h4 id="use-cases-5">Use Cases</h4>

<ul>
  <li>Microservices environments where API requests need efficient routing.</li>
  <li>Advanced network control and security are required for service communication.</li>
</ul>

<h4 id="when-not-to-use--anti-pattern-5">When Not to Use / Anti-Pattern</h4>

<ul>
  <li><strong>Over-Engineering</strong>: Adds unnecessary complexity to small systems or monolithic applications.</li>
  <li><strong>Operational Complexity</strong>: Requires significant operational expertise to manage.</li>
  <li><strong>Performance Overhead</strong>: Service meshes can introduce latency due to added layers of communication management.</li>
</ul>

<h3 id="7-proxy-based-middleware-pattern">7. Proxy-Based Middleware Pattern</h3>

<p>In a <strong>Proxy-Based Middleware</strong> pattern, a proxy sits between the API and backend systems, handling communication, routing, and transformation tasks.</p>

<h4 id="key-features-6">Key Features</h4>

<ul>
  <li><strong>Protocol Translation</strong>: Converts communication protocols.</li>
  <li><strong>Caching</strong>: Caches responses to reduce load and improve performance.</li>
  <li><strong>Load Balancing</strong>: Distributes requests across backend systems.</li>
</ul>

<h4 id="use-cases-6">Use Cases</h4>

<ul>
  <li>When you need to abstract the complexity of multiple backend systems from the API.</li>
  <li>Scenarios requiring load balancing, caching, and protocol translation.</li>
</ul>

<h4 id="when-not-to-use--anti-pattern-6">When Not to Use / Anti-Pattern</h4>

<ul>
  <li><strong>Transparency Issues</strong>: Excessive abstraction can make debugging and monitoring difficult.</li>
  <li><strong>Single Point of Failure</strong>: A poorly managed proxy can become a bottleneck.</li>
  <li><strong>Overuse of Caching</strong>: Too much caching can lead to stale data or inconsistent responses.</li>
</ul>

<h3 id="conclusion">Conclusion</h3>

<p>Selecting the right middleware pattern for integrating multiple systems through a single API depends on your specific requirements and constraints. While each pattern has its strengths, it’s crucial to avoid common pitfalls and recognize when a pattern might become an anti-pattern, introducing unnecessary complexity or performance issues.</p>

<p>By carefully considering the use cases and potential downsides, you can design a middleware layer that not only meets your current needs but also scales and evolves with your system over time.</p>]]></content><author><name>Dan Jones</name></author><category term="architecture" /><summary type="html"><![CDATA[In this post, we’ll explore some of the most common middleware patterns for API integrations, detailing their key features, ideal use cases, and when they might become an anti-pattern.]]></summary></entry><entry><title type="html">Devcontainers and Continuous Integration</title><link href="https://www.skilledcookie.com/2021/04/06/devcontainers-and-continuous-integration/" rel="alternate" type="text/html" title="Devcontainers and Continuous Integration" /><published>2021-04-06T08:00:00+00:00</published><updated>2021-04-06T08:00:00+00:00</updated><id>https://www.skilledcookie.com/2021/04/06/devcontainers-and-continuous-integration</id><content type="html" xml:base="https://www.skilledcookie.com/2021/04/06/devcontainers-and-continuous-integration/"><![CDATA[<h3 id="introduction-to-devcontainers">Introduction to devcontainers</h3>
<p>Devcontainers within Visual Studio Code (VS Code) is a powerful concept, being able to create a Docker container with all the tooling and runtime stacks a developer needs to work on a given project, without having to install anything but <a href="https://docs.docker.com/get-started/">Docker</a>, <a href="https://code.visualstudio.com/">VS Code</a> and the <a href="https://marketplace.visualstudio.com/items?itemName=ms-vscode-remote.remote-containers">VS Code Remote Containers</a> extension.</p>

<p>Essentially devcontainers are VS Code workspace instances that live within the Docker container, when first opening the container the workspace instance is installed and connected to the VS Code UI working in the browser or your local machine.</p>

<p><img src="https://code.visualstudio.com/assets/docs/remote/containers/architecture-containers.png" alt="VS Code remote containers architecture diagram" />
<em>The above diagram is taken from the VS Code <a href="https://code.visualstudio.com/docs/remote/containers">website</a></em></p>

<p>Probably you’ve heard a lot about GitHub Codespaces lately, an upcoming feature in GitHub, which essentially uses devcontainers to make its features work.</p>

<h3 id="what-has-this-got-to-do-with-continuous-integration">What has this got to do with continuous integration?</h3>
<p>Devcontainers as a concept have little to do with continuous integration (CI), but the Docker container used for the devcontainer to run in does. Your dockerfile contains all the specific versions of tools and runtime stacks you need to do the work.</p>

<p>When moving to CI you then need to make your CI runner build and test the application, meaning you now need to ensure the runner has all the correct tooling with the same versions to do the job correctly. Though having slightly different versions can make little difference, for consistency we want to ensure what the developer is developing with the same tools used in CI.</p>

<h3 id="what-are-we-going-to-do">What are we going to do?</h3>
<p>We will create a simple application to run within VS Code devcontainers and set up testing, then move to the CI to run the build and test process there within the Docker container. We will be using GitHub actions for the example, but the concepts work with most modern CI systems.</p>

<p><em>Before continuing, ensure you have Docker and VS Code installed on to your machine.</em></p>

<h3 id="create-a-devcontainer-workspace">Create a devcontainer workspace</h3>
<p>We want to build a React web app, so we need a container that has NodeJS installed, we can create our own Dockerfile with all our tools and configurations setup, or pull an existing image from a Docker repo, for this app, we will use the Microsoft standard NodeJS devcontainer.</p>

<p>Firstly, lets create our workspace.</p>

<div class="language-bash highlighter-rouge"><div class="highlight"><pre class="highlight"><code><span class="nb">mkdir </span>ci-sample-app
<span class="nb">cd </span>ci-sample-app
</code></pre></div></div>

<p>Next create a folder <code class="language-plaintext highlighter-rouge">.devcontainer</code> and inside add a new file <code class="language-plaintext highlighter-rouge">.devcontainer.json</code> and inside add the image we want to use as our devcontainer.</p>

<div class="language-json highlighter-rouge"><div class="highlight"><pre class="highlight"><code><span class="p">{</span><span class="w">
  </span><span class="nl">"image"</span><span class="p">:</span><span class="w"> </span><span class="s2">"mcr.microsoft.com/vscode/devcontainers/typescript-node:0-12"</span><span class="w">
</span><span class="p">}</span><span class="w">
</span></code></pre></div></div>

<p>Next we will install the <code class="language-plaintext highlighter-rouge">Remote - Containers</code> extension for VS Code. You can install this from the extension’s menu in VS Code or if you have the VS Code path reference set, you can run a command in the root of the project.</p>

<div class="language-bash highlighter-rouge"><div class="highlight"><pre class="highlight"><code>code <span class="nt">--install-extension</span> ms-vscode-remote.remote-containers
</code></pre></div></div>

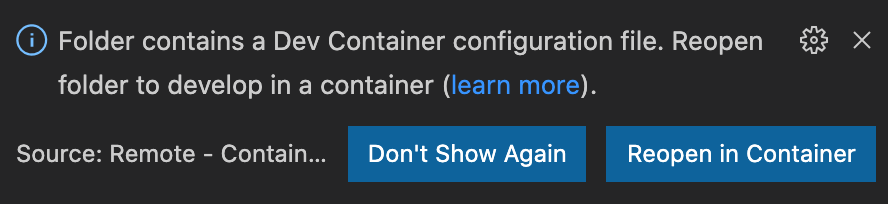
<p>You may need to restart VS Code and once you do, you will be asked if you would like to open the project in a devcontainer.</p>

<p><img src="/img/blog/open-in-dev-container.png" alt="Open in devcontainer" /></p>

<p>Click reopen. The first time you do this it will pull the Docker image down from the remote repository, which may take some time.</p>

<p>When everything is complete, everything will still look the same as before, but the VS Code workspace is now running exclusively inside the Docker container.</p>

<h3 id="creating-the-react-web-app">Creating the React web app</h3>
<p>Now we are running in the context of the container, we will create the sample React app and get it running using <a href="https://www.npmjs.com/package/npm">npm</a> as our package manager.</p>

<p>Using the VS Code terminal, which can be opened from the top menu under <code class="language-plaintext highlighter-rouge">Terminal</code>, <code class="language-plaintext highlighter-rouge">New Terminal</code>, run the following to create a new React app.</p>

<div class="language-bash highlighter-rouge"><div class="highlight"><pre class="highlight"><code>npx create-react-app app
<span class="nb">cd </span>app
<span class="nb">rm</span> <span class="nt">-rf</span> .git <span class="c"># remove git binding as we want to initialize in the root directory</span>
npm start
</code></pre></div></div>

<p>This will start the React app on port 3000, but if you try to access <a href="http://localhost:3000/">http://localhost:3000/</a>, you will notice you can’t, this is because we first need to expose the port from within the devcontainer, which can be done inside <code class="language-plaintext highlighter-rouge">devcontainer.json</code>.</p>

<div class="language-json highlighter-rouge"><div class="highlight"><pre class="highlight"><code><span class="p">{</span><span class="w">
  </span><span class="nl">"image"</span><span class="p">:</span><span class="w"> </span><span class="s2">"mcr.microsoft.com/vscode/devcontainers/typescript-node:0-12"</span><span class="p">,</span><span class="w">
  </span><span class="nl">"forwardPorts"</span><span class="p">:</span><span class="w"> </span><span class="p">[</span><span class="mi">3000</span><span class="p">]</span><span class="w">
</span><span class="p">}</span><span class="w">
</span></code></pre></div></div>

<p>Inside the <code class="language-plaintext highlighter-rouge">.devcontainer.json</code> you can also add VS Code extensions, so every time someone opens the devcontainer they are greeted with the same IDE setup, for example, you may want to add an ESLint extension.</p>

<div class="language-json highlighter-rouge"><div class="highlight"><pre class="highlight"><code><span class="p">{</span><span class="w">
  </span><span class="nl">"image"</span><span class="p">:</span><span class="w"> </span><span class="s2">"mcr.microsoft.com/vscode/devcontainers/typescript-node:0-12"</span><span class="p">,</span><span class="w">
  </span><span class="nl">"extensions"</span><span class="p">:</span><span class="w"> </span><span class="p">[</span><span class="s2">"dbaeumer.vscode-eslint"</span><span class="p">],</span><span class="w">
  </span><span class="nl">"forwardPorts"</span><span class="p">:</span><span class="w"> </span><span class="p">[</span><span class="mi">3000</span><span class="p">]</span><span class="w">
</span><span class="p">}</span><span class="w">
</span></code></pre></div></div>

<p>There are extensions to add Unit Test UI for easy of testing and many, many more.</p>

<p>When editing .devcontainer within the devcontainer, we need to rebuild the container to get the changes.</p>

<p>At the bottom left of VS Code you will see a section containing the words <code class="language-plaintext highlighter-rouge">Dev Container</code>.</p>

<p><img src="/img/blog/vscode-devcontainer-bottom-left.png" alt="Dev Container" /></p>

<p>Clicking this will bring up a menu at the top, select “Remote-Containers: Rebuild Container”.</p>

<p><img src="/img/blog/rebuild-devcontainer.png" alt="Rebuild Container" /></p>

<p>You should now be able to visit <a href="http://localhost:3000/">http://localhost:3000/</a> and see the basic React app up and running.</p>

<p>The sample contains tests, which can be run using npm.</p>

<div class="language-bash highlighter-rouge"><div class="highlight"><pre class="highlight"><code>npm <span class="nb">test</span>
</code></pre></div></div>

<p>You can create a release bundle by running <code class="language-plaintext highlighter-rouge">npm run build</code>, which will output the content to a folder called <code class="language-plaintext highlighter-rouge">build</code>.</p>

<h3 id="ci-with-github-actions">CI with GitHub Actions</h3>
<p>For this next bit, we will use GitHub Actions to build and test our app using the Docker image used within the devcontainer above.</p>

<p>Create folders in the root of the project as <code class="language-plaintext highlighter-rouge">.github\workflows</code>, then create a file called <code class="language-plaintext highlighter-rouge">build.yml</code> inside the <code class="language-plaintext highlighter-rouge">workflows</code> folder, this will contain our CI code.</p>

<p>We will be using a Linux Hosted machine to do our build, which supports container jobs.</p>

<div class="language-yml highlighter-rouge"><div class="highlight"><pre class="highlight"><code><span class="na">name</span><span class="pi">:</span> <span class="s">Build</span>

<span class="na">on</span><span class="pi">:</span> <span class="s">push</span>

<span class="na">jobs</span><span class="pi">:</span>
  <span class="na">container</span><span class="pi">:</span>
    <span class="na">runs-on</span><span class="pi">:</span> <span class="s">ubuntu-latest</span>
    <span class="na">container</span><span class="pi">:</span> <span class="s">mcr.microsoft.com/vscode/devcontainers/typescript-node:0-12</span>
    <span class="na">steps</span><span class="pi">:</span>
</code></pre></div></div>

<p>Our pipeline is now defined to pull down the same container we used inside our devcontainer and when it runs the <code class="language-plaintext highlighter-rouge">steps</code> (which we will define next), these will be run in the context of the container.</p>

<p>We can run the predefined npm tasks with GitHub Actions, and it will run against our version of npm, or we can run the same commands we have already used to keep consistency.</p>

<div class="language-yml highlighter-rouge"><div class="highlight"><pre class="highlight"><code><span class="na">name</span><span class="pi">:</span> <span class="s">Build</span>

<span class="na">on</span><span class="pi">:</span> <span class="s">push</span>

<span class="na">jobs</span><span class="pi">:</span>
  <span class="na">container</span><span class="pi">:</span>
    <span class="na">runs-on</span><span class="pi">:</span> <span class="s">ubuntu-latest</span>
    <span class="na">container</span><span class="pi">:</span> <span class="s">mcr.microsoft.com/vscode/devcontainers/typescript-node:0-12</span>
    <span class="na">steps</span><span class="pi">:</span>
      <span class="pi">-</span> <span class="na">uses</span><span class="pi">:</span> <span class="s">actions/checkout@v2</span>

      <span class="pi">-</span> <span class="na">run</span><span class="pi">:</span> <span class="s">npm install</span>
        <span class="na">name</span><span class="pi">:</span> <span class="s">Install npm packages</span>
        <span class="na">working-directory</span><span class="pi">:</span> <span class="s">app</span>
      
      <span class="pi">-</span> <span class="na">run</span><span class="pi">:</span> <span class="s">CI=true &amp;&amp; npm test</span>
        <span class="na">name</span><span class="pi">:</span> <span class="s">Test React application</span>
        <span class="na">working-directory</span><span class="pi">:</span> <span class="s">app</span>
      
      <span class="pi">-</span> <span class="na">run</span><span class="pi">:</span> <span class="s">CI=true &amp;&amp; npm run build</span>
        <span class="na">name</span><span class="pi">:</span> <span class="s">Build React app bundle</span>
        <span class="na">working-directory</span><span class="pi">:</span> <span class="s">app</span>

      <span class="pi">-</span> <span class="na">uses</span><span class="pi">:</span> <span class="s">actions/upload-artifact@v2</span>
        <span class="na">with</span><span class="pi">:</span>
          <span class="na">name</span><span class="pi">:</span> <span class="s">app</span>
          <span class="na">path</span><span class="pi">:</span> <span class="s">app/build</span>
</code></pre></div></div>

<p>The last command, will take our build and publish it to the artifacts section of the pipeline run.</p>

<p>Now our code is written we will push it up to a GitHub repo.</p>

<div class="language-bash highlighter-rouge"><div class="highlight"><pre class="highlight"><code>git init
git add <span class="nb">.</span>
git commit <span class="nt">-m</span> <span class="s2">"devcontainer CI sample"</span>
</code></pre></div></div>

<p>Next we will publish to our remote repo (You will want to substitute the GitHub repo with your own).</p>

<div class="language-bash highlighter-rouge"><div class="highlight"><pre class="highlight"><code>git remote add origin https://github.com/skilledcookie/devcontainers-and-ci.git
git branch <span class="nt">-M</span> main
git push <span class="nt">-u</span> origin main
</code></pre></div></div>

<p>This should automatically run the CI pipeline, which you can see under “Actions” in the repository. <a href="https://github.com/skilledcookie/devcontainers-and-ci/actions">See this in our GitHub repo now!</a></p>

<h3 id="ci-in-azure-pipelines-example">CI in Azure Pipelines example</h3>
<p>Azure Pipelines is very similar to GitHub Actions syntax, if you would like to run this example using Azure DevOps, below is the equivalent to the script posted above.</p>

<div class="language-yml highlighter-rouge"><div class="highlight"><pre class="highlight"><code><span class="na">pool</span><span class="pi">:</span>
  <span class="na">vmImage</span><span class="pi">:</span> <span class="s1">'</span><span class="s">ubuntu-latest'</span>

<span class="na">container</span><span class="pi">:</span> <span class="s2">"</span><span class="s">mcr.microsoft.com/vscode/devcontainers/typescript-node:0-12"</span>

<span class="na">steps</span><span class="pi">:</span>
<span class="pi">-</span> <span class="na">bash</span><span class="pi">:</span> <span class="s">npm install</span>
  <span class="na">displayName</span><span class="pi">:</span> <span class="s">Install npm packages</span>
  <span class="na">workingDirectory</span><span class="pi">:</span> <span class="s">app</span>

<span class="pi">-</span> <span class="na">bash</span><span class="pi">:</span> <span class="s">npm test</span>
  <span class="na">displayName</span><span class="pi">:</span> <span class="s">Test React application</span>
  <span class="na">workingDirectory</span><span class="pi">:</span> <span class="s">app</span>
  <span class="na">env</span><span class="pi">:</span>
    <span class="na">CI</span><span class="pi">:</span> <span class="no">true</span>

<span class="pi">-</span> <span class="na">bash</span><span class="pi">:</span> <span class="s">npm run build</span>
  <span class="na">displayName</span><span class="pi">:</span> <span class="s">Build React app bundle</span>
  <span class="na">workingDirectory</span><span class="pi">:</span> <span class="s">app</span>
  <span class="na">env</span><span class="pi">:</span>
    <span class="na">CI</span><span class="pi">:</span> <span class="no">true</span>

<span class="pi">-</span> <span class="na">publish</span><span class="pi">:</span> <span class="s">app/build</span>
  <span class="na">artifact</span><span class="pi">:</span> <span class="s">app</span>
  <span class="na">displayName</span><span class="pi">:</span> <span class="s">Publish to Pipeline Artifacts</span>
</code></pre></div></div>

<h3 id="more-patterns">More patterns</h3>
<p>Above you saw a basic example of how you can use the same Docker container you use in devcontainers in your CI pipelines, but there are other patterns you can use alongside this to add more flexibility to your development workflow.</p>

<ul>
  <li><strong>Use a Dockerfile</strong> to customize your container adding more tools specific to your development and CI workflow, for example adding Terraform to manage your infrastructure.</li>
  <li><strong>Remote Docker repositories</strong> like Docker Hub or Azure Container Registry can store and share your private or public images across projects, without the need to build each time.</li>
  <li><strong>Use Docker tags</strong> to version your Docker images, so devcontainers and CI can target a specific version, and you can upgrade when you choose, or force the use of the <code class="language-plaintext highlighter-rouge">latest</code> tag to ensure everyone is always working with the latest development container.</li>
</ul>

<h3 id="exciting-times-ahead">Exciting times ahead</h3>
<p>Overall devcontainers are a very powerful concept and bringing the same container in to your CI pipeline ensures consistency in your development workflow, ensuring you aren’t using different tools or versions of tools in either place.</p>

<p>It will be interesting to see how the devcontainer landscape evolves once GitHub Codespaces is finally released to the public.</p>

<h3 id="related-resources">Related resources</h3>
<ul>
  <li><a href="https://docs.github.com/en/actions">Git Hub actions</a></li>
  <li><a href="https://azure.microsoft.com/en-gb/services/devops/pipelines/">Azure Pipelines</a></li>
  <li><a href="https://code.visualstudio.com/docs/remote/containers">Developing inside a container</a></li>
  <li><a href="https://docs.docker.com/get-started/">Getting started with Docker</a></li>
  <li><a href="https://code.visualstudio.com/docs">Getting started with VS Code</a></li>
</ul>

<h3 id="source-code">Source code</h3>
<p>The source code for this post can be found at <a href="https://github.com/skilledcookie/devcontainers-and-ci">https://github.com/skilledcookie/devcontainers-and-ci</a></p>

<h3 id="comments">Comments</h3>
<p>Comments can be made on the LinkedIn post <a href="https://www.linkedin.com/posts/danjones10_devcontainers-and-continuous-integration-activity-6785095135559487488-MUTc">here</a>.</p>]]></content><author><name>Dan Jones</name></author><category term="github-actions" /><category term="vscode" /><category term="devcontainers" /><category term="docker" /><category term="azure-pipelines" /><summary type="html"><![CDATA[How to use devcontainers to create a consistent development and continuous integration work flow.]]></summary></entry><entry><title type="html">Manipulating Pipelines with Templates and Expressions</title><link href="https://www.skilledcookie.com/2021/03/18/manipulating-pipelines-with-templates-and-expressions/" rel="alternate" type="text/html" title="Manipulating Pipelines with Templates and Expressions" /><published>2021-03-18T15:00:00+00:00</published><updated>2021-03-18T15:00:00+00:00</updated><id>https://www.skilledcookie.com/2021/03/18/manipulating-pipelines-with-templates-and-expressions</id><content type="html" xml:base="https://www.skilledcookie.com/2021/03/18/manipulating-pipelines-with-templates-and-expressions/"><![CDATA[<h3 id="introduction">Introduction</h3>
<p>Beyond creating standard Azure DevOps Pipelines, we can use templates to manipulate a pipelines definition. We can make custom steps run before or after tasks, or add stages based on certain conditions, or choose to reject a pipeline if certain definitions may or may not exist.</p>

<p>By passing the stages, jobs or steps to a template, we can within the template read the definition, and manipulate it how we see fit.</p>

<p>When passing definitions to a template, you must pass them as a specific data type, you can find a list in the <a href="https://docs.microsoft.com/en-us/azure/devops/pipelines/process/runtime-parameters?view=azure-devops&amp;tabs=script#parameter-data-types">Pipelines runtime parameters</a> documentation.</p>

<p>Data types relevant to the context of manipulating our pipeline definitions with templates include the following.</p>

<table>
  <thead>
    <tr>
      <th>Data type</th>
      <th style="text-align: center">Notes</th>
    </tr>
  </thead>
  <tbody>
    <tr>
      <td>step</td>
      <td style="text-align: center">a single step</td>
    </tr>
    <tr>
      <td>stepList</td>
      <td style="text-align: center">sequence of steps</td>
    </tr>
    <tr>
      <td>job</td>
      <td style="text-align: center">a single job</td>
    </tr>
    <tr>
      <td>jobList</td>
      <td style="text-align: center">sequence of jobs</td>
    </tr>
    <tr>
      <td>deployment</td>
      <td style="text-align: center">a single deployment job</td>
    </tr>
    <tr>
      <td>deploymentList</td>
      <td style="text-align: center">sequence of deployment jobs</td>
    </tr>
    <tr>
      <td>stage</td>
      <td style="text-align: center">a single stage</td>
    </tr>
    <tr>
      <td>stageList</td>
      <td style="text-align: center">sequence of stages</td>
    </tr>
  </tbody>
</table>

<h3 id="passing-steps-into-a-template">Passing steps into a template</h3>
<p>We will create a template (<code class="language-plaintext highlighter-rouge">build-policy.yml</code>), which takes pipeline steps as it’s parameter.</p>

<div class="language-yml highlighter-rouge"><div class="highlight"><pre class="highlight"><code><span class="na">parameters</span><span class="pi">:</span>
<span class="pi">-</span> <span class="na">name</span><span class="pi">:</span> <span class="s">stepList</span>
  <span class="na">type</span><span class="pi">:</span> <span class="s">stepList</span>
  <span class="na">default</span><span class="pi">:</span> <span class="pi">[]</span>

<span class="na">steps</span><span class="pi">:</span> <span class="s">${{ parameters.stepList }}</span>
</code></pre></div></div>

<p>This template will just run the given steps. It can be used like the below example.</p>

<div class="language-yml highlighter-rouge"><div class="highlight"><pre class="highlight"><code><span class="pi">-</span> <span class="na">template</span><span class="pi">:</span> <span class="s">build-policy.yml</span>
  <span class="na">parameters</span><span class="pi">:</span>
    <span class="na">stepList</span><span class="pi">:</span>
    <span class="pi">-</span> <span class="na">script</span><span class="pi">:</span> <span class="s">echo "Hello World 1"</span>
    <span class="pi">-</span> <span class="na">script</span><span class="pi">:</span> <span class="s">echo "Hello World 2"</span>
</code></pre></div></div>

<h3 id="intercepting-and-injecting-steps">Intercepting and injecting steps</h3>

<p>What if we wanted to run our own steps before or after the pipeline steps ran in to the template? We would do this by looping through the steps list and render each step individually, which will allow us to write our own tasks before or after.</p>

<p>Going back to our <code class="language-plaintext highlighter-rouge">build-policy.yml</code> example, it would now look like the below.</p>

<div class="language-yml highlighter-rouge"><div class="highlight"><pre class="highlight"><code><span class="na">parameters</span><span class="pi">:</span>
<span class="pi">-</span> <span class="na">name</span><span class="pi">:</span> <span class="s">stepList</span>
  <span class="na">type</span><span class="pi">:</span> <span class="s">stepList</span>
  <span class="na">default</span><span class="pi">:</span> <span class="pi">[]</span>

<span class="na">steps</span><span class="pi">:</span>
<span class="pi">-</span> <span class="na">script</span><span class="pi">:</span> <span class="s">echo "Begin running pipeline steps"</span>
<span class="pi">-</span> <span class="s">${{ each step in parameters.stepList }}</span><span class="err">:</span>
  <span class="pi">-</span> <span class="s">${{ each pair in step }}</span><span class="err">:</span>
      <span class="s">${{ pair.key }}</span><span class="err">:</span> <span class="s">${{ pair.value }}</span>  
<span class="pi">-</span> <span class="na">script</span><span class="pi">:</span> <span class="s">echo "Finished running pipeline steps"</span>
</code></pre></div></div>

<p>When run the pipeline definition will execute the same as below.</p>

<div class="language-yml highlighter-rouge"><div class="highlight"><pre class="highlight"><code><span class="na">steps</span><span class="pi">:</span>
<span class="pi">-</span> <span class="na">script</span><span class="pi">:</span> <span class="s">echo "Begin running pipeline steps"</span>
<span class="pi">-</span> <span class="na">script</span><span class="pi">:</span> <span class="s">echo "Hello World 1"</span>
<span class="pi">-</span> <span class="na">script</span><span class="pi">:</span> <span class="s">echo "Hello World 2"</span>
<span class="pi">-</span> <span class="na">script</span><span class="pi">:</span> <span class="s">echo "Finished running pipeline steps"</span>
</code></pre></div></div>

<h3 id="iterate-through-the-steps">Iterate through the steps</h3>

<p>In the above example you will notice <code class="language-plaintext highlighter-rouge">- ${{ each pair in step }}:</code>, which loops through the top level definition of the steps, which is a little confusing at first, but in reality, it’s pretty simple, which I will try to clarify with an example.</p>

<div class="language-yml highlighter-rouge"><div class="highlight"><pre class="highlight"><code><span class="na">parameters</span><span class="pi">:</span>
  <span class="na">demo</span><span class="pi">:</span>
    <span class="pi">-</span> <span class="na">segment</span><span class="pi">:</span> <span class="s">first</span>
      <span class="na">action</span><span class="pi">:</span> <span class="s">test</span>
      <span class="na">value</span><span class="pi">:</span> <span class="m">1</span>
    <span class="pi">-</span> <span class="na">segment</span><span class="pi">:</span> <span class="s">second</span>
      <span class="na">action</span><span class="pi">:</span> <span class="s">run</span>
      <span class="na">value</span><span class="pi">:</span> <span class="m">2</span>

<span class="na">steps</span><span class="pi">:</span>
<span class="pi">-</span> <span class="s">${{ each demoItem in parameters.demo }}</span><span class="err">:</span>
  <span class="pi">-</span> <span class="s">${{ each pair in demoItem.segment }}</span><span class="err">:</span>
    <span class="pi">-</span> <span class="na">script</span><span class="pi">:</span> <span class="s">echo "${{ pair.key }} - ${{ pair.value }}"</span>
</code></pre></div></div>

<p>The above example will output the following.</p>

<div class="language-plaintext highlighter-rouge"><div class="highlight"><pre class="highlight"><code>segment - first
action -  test
value - 1
segment - second
action - run
value - 2
</code></pre></div></div>

<h3 id="throwing-compile-time-errors-with-conditions">Throwing compile time errors with conditions</h3>

<p>When a pipeline is first executed, as part of the normal checks, it will run any logic and perform any substitutions within <code class="language-plaintext highlighter-rouge">$</code> syntax, if this fails for any reason, it will output errors before starting the pipeline run, we can take advantage of this, by providing our own custom exception output.</p>

<p>In the above examples, we use the <code class="language-plaintext highlighter-rouge">script</code> task, which depending on the OS will execute in <code class="language-plaintext highlighter-rouge">bash</code> or <code class="language-plaintext highlighter-rouge">powershell</code>, which isn’t great for reusability, so what if we want to stop our pipeline from using it altogether?</p>

<p>Our first step is to edit our definition and if the <code class="language-plaintext highlighter-rouge">script</code> task is detected, throw an error at compile time to stop the pipeline even starting.</p>

<div class="language-yml highlighter-rouge"><div class="highlight"><pre class="highlight"><code><span class="na">parameters</span><span class="pi">:</span>
<span class="pi">-</span> <span class="na">name</span><span class="pi">:</span> <span class="s">stepList</span>
  <span class="na">type</span><span class="pi">:</span> <span class="s">stepList</span>
  <span class="na">default</span><span class="pi">:</span> <span class="pi">[]</span>

<span class="na">steps</span><span class="pi">:</span>
<span class="pi">-</span> <span class="na">bash</span><span class="pi">:</span> <span class="s">echo "Begin running pipeline steps"</span>
<span class="pi">-</span> <span class="s">${{ each step in parameters.stepList }}</span><span class="err">:</span>
  <span class="pi">-</span> <span class="s">${{ each pair in step }}</span><span class="err">:</span>
      <span class="s">${{ if eq(pair.key, 'script') }}</span><span class="err">:</span>
        <span class="s1">'</span><span class="s">script</span><span class="nv"> </span><span class="s">tasks</span><span class="nv"> </span><span class="s">are</span><span class="nv"> </span><span class="s">not</span><span class="nv"> </span><span class="s">allowed!'</span><span class="err">:</span> <span class="s">error</span>
      <span class="s">${{ if ne(pair.key, 'script') }}</span><span class="err">:</span>
        <span class="s">${{ pair.key }}</span><span class="err">:</span> <span class="s">${{ pair.value }}</span>  
<span class="pi">-</span> <span class="na">bash</span><span class="pi">:</span> <span class="s">echo "Finished running pipeline steps"</span>
</code></pre></div></div>

<p>There aren’t many options for exceptions in Azure Pipelines, but by providing a message, followed by <code class="language-plaintext highlighter-rouge">: error</code>, an exception will be thrown at compile time, which will output your message on screen.</p>

<p>If we want to say throw an error if a condition is met, else it will allow the predefined step to run, we do this with 2 <code class="language-plaintext highlighter-rouge">if</code> statements of opposing condition, since there is no <code class="language-plaintext highlighter-rouge">if, else</code> syntax within pipelines.</p>

<h3 id="enforcing-standards-with-extension-templates">Enforcing standards with extension templates</h3>

<p>Lastly what if we wanted to enforce this throughout the pipeline? We do this by changing how we use the template in the pipeline and use the <code class="language-plaintext highlighter-rouge">extends</code> syntax.</p>

<div class="language-yml highlighter-rouge"><div class="highlight"><pre class="highlight"><code><span class="na">extends</span><span class="pi">:</span>
  <span class="na">template</span><span class="pi">:</span> <span class="s">build-policy.yml</span>
  <span class="na">parameters</span><span class="pi">:</span>
    <span class="na">stepList</span><span class="pi">:</span>
    <span class="pi">-</span> <span class="na">script</span><span class="pi">:</span> <span class="s">echo "Hello World 1"</span>
    <span class="pi">-</span> <span class="na">script</span><span class="pi">:</span> <span class="s">echo "Hello World 2"</span>
</code></pre></div></div>

<p>The <code class="language-plaintext highlighter-rouge">extends</code> syntax is used at the top of the pipeline, with any <code class="language-plaintext highlighter-rouge">steps</code>, <code class="language-plaintext highlighter-rouge">jobs</code> or <code class="language-plaintext highlighter-rouge">stages</code> being passed in as parameters, so the template will have access to the entire set of pipeline tasks.</p>

<p>Extension templates can optionally be stored in a shared repository and used within a pipeline of a different repository, which is great for shared company policy templates.</p>

<p>If you moved our templates file in to a repository called <code class="language-plaintext highlighter-rouge">automation</code>, we could then implement it by using a repository resource similar to the one below.</p>

<div class="language-yml highlighter-rouge"><div class="highlight"><pre class="highlight"><code><span class="na">resources</span><span class="pi">:</span>
  <span class="na">repositories</span><span class="pi">:</span>
  <span class="pi">-</span> <span class="na">repository</span><span class="pi">:</span> <span class="s">automation</span>  <span class="c1"># identifier</span>
    <span class="na">type</span><span class="pi">:</span> <span class="s">git</span> 
    <span class="na">name</span><span class="pi">:</span> <span class="s">fabrikam/automation</span>  <span class="c1"># repository name (format depends on `type`)</span>
    <span class="na">ref</span><span class="pi">:</span> <span class="s">refs/heads/master</span>  

<span class="na">extends</span><span class="pi">:</span>
  <span class="na">template</span><span class="pi">:</span> <span class="s">build-policy.yml@automation</span>
  <span class="na">parameters</span><span class="pi">:</span>
    <span class="na">stepList</span><span class="pi">:</span>
    <span class="pi">-</span> <span class="na">script</span><span class="pi">:</span> <span class="s">echo "Hello World 1"</span>
    <span class="pi">-</span> <span class="na">script</span><span class="pi">:</span> <span class="s">echo "Hello World 2"</span>
</code></pre></div></div>

<h3 id="things-to-be-aware-of">Things to be aware of</h3>

<p>When consuming extension templates from a shared repository, you need to be aware of the following;</p>

<p><em>1</em> - Local templates must have <code class="language-plaintext highlighter-rouge">@self</code> on the end when being imported in to the pipeline definition.</p>

<p>Before using an extension template.</p>
<div class="language-yml highlighter-rouge"><div class="highlight"><pre class="highlight"><code><span class="c1"># ci/azure-pipelines.yml</span>
<span class="nn">...</span>
<span class="na">steps</span><span class="pi">:</span>
<span class="pi">-</span> <span class="na">template</span><span class="pi">:</span> <span class="s">templates/build.yml</span>
</code></pre></div></div>

<p>After applying an extension template.</p>
<div class="language-yml highlighter-rouge"><div class="highlight"><pre class="highlight"><code><span class="c1"># ci/azure-pipelines.yml</span>
<span class="nn">...</span>
<span class="na">steps</span><span class="pi">:</span>
<span class="pi">-</span> <span class="na">template</span><span class="pi">:</span> <span class="s">ci/templates/build.yml@self</span>
</code></pre></div></div>

<p><em>2</em> - Local template imports now become relative to <code class="language-plaintext highlighter-rouge">$(System.DefaultWorkingDirectory)</code>, instead of the pipeline directory (shown in the above example).</p>

<p><em>3</em> - If you have other templates you wish to use inside the extension template context, from the shared repository, they will need to be included relative to the extension templates folder.</p>

<p>If we have an extension template in a shared repository, lets say <code class="language-plaintext highlighter-rouge">extensions/policy.yml</code> and a reusable build template in the same repository <code class="language-plaintext highlighter-rouge">templates/build.yml</code>, then in the pipeline, we would use them together as follows.</p>

<div class="language-yml highlighter-rouge"><div class="highlight"><pre class="highlight"><code><span class="na">resources</span><span class="pi">:</span>
  <span class="na">repositories</span><span class="pi">:</span>
  <span class="pi">-</span> <span class="na">repository</span><span class="pi">:</span> <span class="s">automation</span>  <span class="c1"># identifier</span>
    <span class="na">type</span><span class="pi">:</span> <span class="s">git</span> 
    <span class="na">name</span><span class="pi">:</span> <span class="s">fabrikam/automation</span>  <span class="c1"># repository name (format depends on `type`)</span>
    <span class="na">ref</span><span class="pi">:</span> <span class="s">refs/heads/master</span>  

<span class="na">extends</span><span class="pi">:</span>
  <span class="na">template</span><span class="pi">:</span> <span class="s">extensions/policy.yml@automation</span>
  <span class="na">parameters</span><span class="pi">:</span>
    <span class="na">stepList</span><span class="pi">:</span>
    <span class="c1"># relative to extensions folder</span>
    <span class="pi">-</span> <span class="na">template</span><span class="pi">:</span> <span class="s">../templates/build.yml@automation</span>
</code></pre></div></div>

<h3 id="powerful-stuff">Powerful stuff</h3>

<p>By using the examples above in regard to <code class="language-plaintext highlighter-rouge">steps</code> (stepList), you can apply the same processes over <code class="language-plaintext highlighter-rouge">jobs</code> (jobsList) and <code class="language-plaintext highlighter-rouge">stages</code> (stageList) too, and can get even more complex by iterating stages and their jobs, or even the jobs and their steps and apply your own logic in regard to the defined pipeline.</p>

<p>Overall expressions and templates within Azure Pipelines are very powerful, allowing you to enforce your own standards and checks, allowing compliance and security to be built in by default in to every new pipeline by sharing them.</p>

<h3 id="what-kind-of-things-can-i-do">What kind of things can I do?</h3>

<p>There are many use cases for manipulating the pipeline using templates, avoiding you having to keep repeating your code in every pipeline, or just to enforce compliance. Here is just a few scenarios to get you started.</p>

<ul>
  <li><strong>Pushing notifications</strong> to remote systems when a new stage or deployment job starts or ends, for auditing or updates to service tickets.</li>
  <li><strong>Avoid certain pipeline tasks being used</strong> (like the script example discussed above), to ensure a consistent approach, or to help with security concerns.</li>
  <li><strong>Restrict deployments</strong> to specific branches to enhance security.</li>
  <li><strong>Injecting steps</strong> before or after steps defined in the pipeline run, maybe to get the environment in to a secure or useable state before a pipeline executes its steps.</li>
  <li><strong>Enforcing a branching strategy</strong> by failing pipelines before they run if the correct branch isn’t used. You could also check a pull requests source and target branches at runtime and fail if it’s not a correct transition.</li>
  <li><strong>Checking with remote services</strong> before deploying to ensure certain checks have been passed before continuing.</li>
</ul>

<p>There are a lot more things you could do, but the main point is that these templates are abstracted from the pipeline. This has the benefit’s of being repeatable and the consumer doesn’t need to care about what, or how they are doing something, it should simply do it.</p>

<h3 id="related-resources">Related resources</h3>

<ul>
  <li><a href="https://docs.microsoft.com/en-us/azure/devops/pipelines/process/expressions?view=azure-devops">Azure Pipelines Expressions</a></li>
  <li><a href="https://docs.microsoft.com/en-us/azure/devops/pipelines/process/templates?view=azure-devops">Azure Pipelines Templates</a></li>
  <li><a href="https://docs.microsoft.com/en-us/azure/devops/pipelines/yaml-schema?view=azure-devops&amp;tabs=schema%2Cparameter-schema">Azure Pipelines Schema Reference</a></li>
  <li><a href="https://docs.microsoft.com/en-us/azure/devops/pipelines/process/runtime-parameters?view=azure-devops&amp;tabs=script">Azure Pipelines Runtime Parameters</a></li>
</ul>]]></content><author><name>Dan Jones</name></author><category term="azure-pipelines" /><category term="azure-devops" /><summary type="html"><![CDATA[How to manipulate an Azure Pipeline using templates and expressions to enforce compliance, improve security and more.]]></summary></entry></feed>